
How to Restore (Refinish) Hardwood Floors Without Sanding?
To restore hardwood floors without sanding, follow these steps:
- Prepare the hardwood floor: Remove furniture, vacuum, and inspect for major damage.
- Deep Clean the hardwood floor: Use a pH-neutral hardwood cleaner and degreasing solution to clean hardwood floor.
- Apply chemical abrasion kit: Apply a chemical abrasion kit solution to remove the top finish layer of hardwood floor.
- Allow to dry and buff: Let the hardwood floor dry completely, then lightly buff the surface.
- Refinish the hardwood floor: Apply a new polyurethane finish in 2-3 coats, allowing proper drying time between coats.
Are hardwood floors in your home looking a bit dull and worn? Don’t worry, it happens to all of us. You might think sanding is the way to go, but hold on a sec. There’s actually a better solution to bring back that shine without making a giant mess or breaking your back.
Believe it or not, cleaning and refinishing old hardwood floors without sanding is easier than you’d expect. And your back and wallet will definitely thank you later on. This guide will walk you through the steps to restore those beautiful planks, without barely lifting a finger. Soon enough, you’ll be falling in love with your hardwood floors all over again.
For homeowners in Philadelphia, finding a reliable service can make all the difference. Our Philadelphia Hardwood Floor Refinishing experts can help you achieve that perfect finish with ease and professionalism.
Ready to transform your floors? Get a FREE On-Site Estimate from our experts!
We’ll provide a detailed cost breakdown so you know exactly what to expect. No obligations, just professional advice!
We serve nationwide in all cities. Call us now, toll-free!
Call Now: +1 (877) 417-3933 Get Your Free EstimateHow to Prepare Hardwood Floor for Restoration Without Sanding?
Before diving into restoring and cleaning your old hardwood floors without sandinf, let’s get the room ready. First, remove all furniture and decor to create an open space. Next, give the floors a thorough vacuuming to eliminate loose dirt, dust, and debris, ensuring you reach every nook and cranny.
1. Assessing the Floor’s Condition
With the room cleared, inspect the hardwood floors closely. Look for major scratches, dents, or gouges that may require extra attention. Check for discoloration, water damage, or warping, as these issues could affect the restoration process. Note any areas where the finish has worn away, exposing the bare wood underneath.
2. Gathering Necessary Tools and Materials
Gather the tools and materials needed for the restoration process:
- Hardwood floor cleaner (pH-neutral)
- Degreasing solution (hardwood floor safe)
- Mops, buckets, and clean cloths
- Stiff-bristled brushes or hardwood floor scrubbers
- Wood filler (for minor repairs)
- Putty knife
- Orbital floor buffer or rotary floor machine
- Hardwood floor restorer or revitalizer product
- Applicator pads or brushes for the restorer
- Protective floor coating (optional)
3. Deep Cleaning and Degreasing
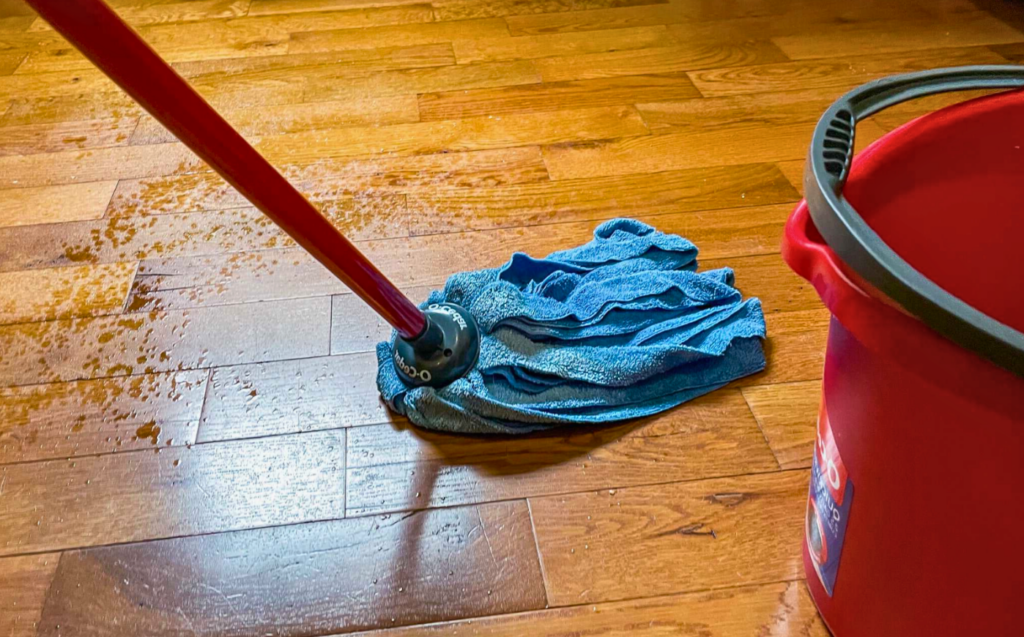
Now, it’s time for a deep clean. Sweep or vacuum again to remove any remaining surface grit. Then, mix a solution of warm water and a pH-neutral hardwood floor cleaner (avoid harsh chemicals). Using a clean mop or cloth, apply the solution generously across the entire floor, reaching into corners and crevices. Once the solution has worked its magic, wipe away excess moisture with a clean, damp mop or cloth. Allow the floors to dry completely before proceeding.
4. Applying the Chemical Solution
For stubborn grease or oil stains, use a hardwood floor-safe degreasing solution. This solution helps remove the top layer of your floor’s finish, revealing fresh wood underneath. But be careful! These chemicals are strong, so you’ll need to wear gloves, goggles, and a mask to protect yourself.
Once you’re all geared up, pour the solution onto the floor and spread it evenly using a mop or applicator. Work in small sections to ensure even coverage.
5. Neutralizing and Rinsing
After letting the chemical solution work its magic for the recommended time, it’s crucial to neutralize and rinse the floors. This step removes any leftover chemicals that could cause problems later on.
First, apply a neutralizing agent as instructed by the manufacturer. Then, rinse the floors thoroughly with clean water, using a mop or wet-dry vacuum to remove any excess liquid. Rinse multiple times to ensure every nook and cranny is chemical-free.
6. Drying and Preparing for Refinishing
Now, it’s time to let the floors dry completely. This might take a day or two, depending on the humidity and airflow in your space. Patience is key here – rushing could lead to issues later on.
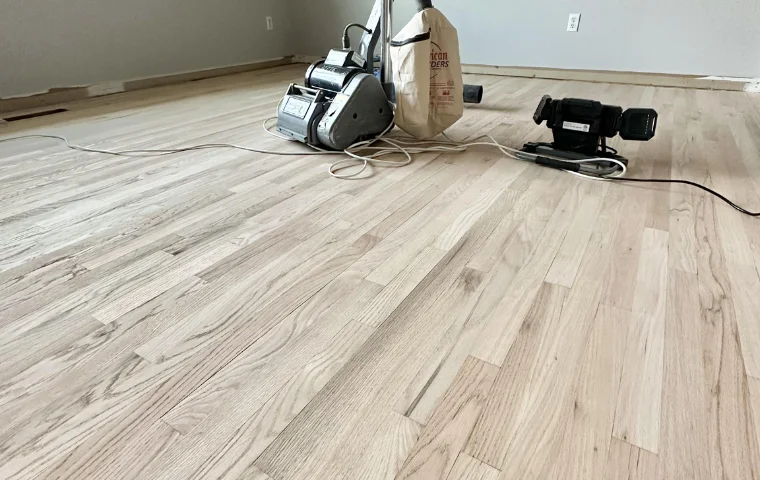
Once the floors are bone-dry, you’ll need to prepare the surface for refinishing. This typically involves a light sanding or buffing to smooth out any rough spots or imperfections. The goal is to create a pristine surface for the new finish to adhere to.
Chemical Abrasion Kits for Hardwood Floors Restoration
Chemical abrasion kits offer a straightforward solution to restore the natural beauty of your floors.
How Do Chemical Abrasion Kits Work?
Chemical abrasion kits work in two simple steps. First, you apply a specialized chemical solution that gently removes the top layer of the polyurethane finish. This solution effectively strips away the old, damaged coating without harming the bare wood underneath.
Next, you neutralize the chemicals with another solution provided in the kit. After cleaning the surface, you’re left with fresh, like-new wood ready for a new protective top coat.
Types of Chemical Abrasion Kits
Chemical abrasion kits come in various formulations to suit different wood types and finish conditions. Some common options include:
- Basic kits for minor scratches and dullness
- Heavy-duty kits for removing deep grooves or stains
- Kits specifically designed for softwoods like pine or hardwoods like oak
- Low-odor and eco-friendly plant-based formulas
With the variety available, you can find the perfect kit to address your specific floor restoration needs.
Advantages of Chemical Abrasion Kits
Using a chemical abrasion kit offers several advantages over traditional sanding methods:
- Avoids noise, dust, and major disruptions caused by sanding
- More cost-effective and simpler for DIY projects than hiring professionals
- Quickly removes old finishes without damaging the wood
- Versatile for use on floors, stairs, furniture, and more
Considerations and Limitations
While chemical abrasion kits are a convenient solution, it’s important to consider the following:
- Careful application and ventilation are required when using chemicals
- Extremely deep gouges or stains may not be completely removed
- Results can vary based on the type of wood and the existing finish condition
Step-By-Step Guide To Restore Hardwood Floors Without Sanding
You don’t always need to sand your hardwood floors to make them look new again. Refinishing without sanding is a faster and cheaper way to bring back their beauty. By following the steps below, you can transform your hardwood floors with a rejuvenated appearance effortlessly, without sanding being required.
1. Choosing the Right hardwood Floor Finish
You can choose between stains and clear coats like polyurethane. Stains add color and highlight the wood’s natural grain pattern. Clear coats provide a shiny, protective layer on top.
If your floors just have minor scratches or look dull, a clear coat may be enough. But for deeper scratches, discoloration or an outdated stain, you’ll likely need to apply a new stain first before the clear coat. Keep in mind stains can slightly change the original wood color.
Water-based polyurethane is a popular clear coat choice. It dries fast, has low odor, and is environmentally friendly. Oil-based polyurethane is very durable and gives a warm, amber tone to the wood.
2. Applying the Finish to recoat Hardwood Floor
First, thoroughly clean your floors to remove any dirt, grease or old wax build-up so the new finish can properly stick. You may need to lightly buff the surface for better adhesion.
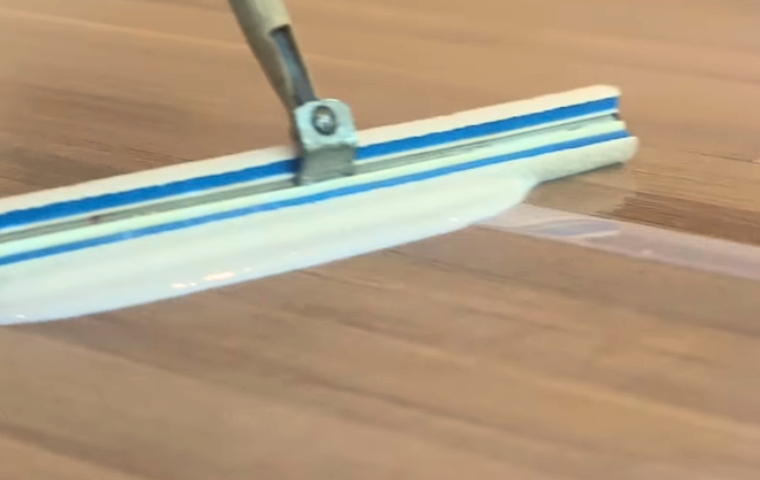
If using a stain, apply it with a rag or applicator pad following the wood grain direction. Let it fully dry before the clear coat. When applying polyurethane, use a lambswool applicator or high-quality brush for an even finish without streaks. Work in sections, keeping a “wet edge”.
Proper ventilation is important during this process to allow fumes to escape and prevent bubbles forming in the finish.
3. Wait for the coating to dry and cure
Be patient with drying and curing times. Water-based poly dries to the touch in a few hours but needs 24-48 hours before a second coat. Oil-based takes longer between coats at 8-10 hours but cures faster overall.
Apply at least two coats of finish for best protection and durability. More coats means a longer total curing time – usually around 30 days to fully harden.
During curing, avoid heavy foot traffic. Replace furniture carefully to prevent dents or scratches in the new finish.
how to darken hardwood floors without sanding?
You can darkening hardwood floors without sanding through various methods, depending on the floor’s current finish and condition. For floors with an existing oil varnish finish, you can recoat with a tinted oil-varnish can effectively darken them.
For unfinished floors, you can darken using oil-based stains, water-based stains, or aniline dyes. Modern floors with polyurethane finishes may require removal before applying darker finishes.
To darken dark wood naturally, consider using wood stains or tinted finishes, applying multiple coats for the desired effect. Water-popping the grain before staining can help achieve a more uniform and darker color.
Some woodworkers have had success using powder black dye mixed with NGR liquid for difficult woods. Gel stains, like Minwax Gel Stain, can provide even coverage on hard-to-stain woods like pine.
Tinted polyurethane is an option, but it may wear off over time, revealing lighter areas. Products like Polyshades from Minwax allow for darkening hardwood floors without extensive sanding, though dilution and multiple layers may be necessary for the desired color.
When dealing with uneven absorption, adding more stain before applying polyurethane or using toner coats can help. Make sure that you test any chosen method on a small area, such as a closet, before applying it to the entire floor.
While these methods can darken floors without extensive sanding, professionals often recommend complete sanding and refinishing for the best and most durable results. This is especially true for floors with existing issues like rubbed-off varnish or liquid damage.
The process of darkening hardwood floors without sanding may involve chemical stripping, restaining, and finishing with two coats of polyurethane. You should consider costs and time investments for professional refinishing.
It’s important to note that not all hardwood floors can be sanded, particularly engineered hardwood. Safety precautions, such as wearing a respirator during any sanding process, should be observed. Lastly, some experts caution against using water-based varnishes due to potential scuffing issues and recommend solvent-based varnishes for durability.
Troubleshooting and Avoiding Common Mistakes in Hardwood Floor Restoration
When restoring hardwood floors using chemical abrasion, you should be aware of potential issues. Addressing common mistakes early on can save you time and effort. Let’s explore some prevalent problems and how to avoid them.
Uneven Application of Chemical Solution
One frequent issue is applying the chemical solution unevenly across the floor. This can lead to an inconsistent appearance, with some areas looking darker or lighter. To prevent this, proper preparation and a systematic application technique are crucial.
First, ensure the hardwood floor is completely clean and free of debris before applying the solution. Any dirt or grime left behind can interfere with the chemical reaction, causing uneven results.
Next, work in small sections and use a consistent application method, whether it’s a mop, sprayer, or specialized tool. Overlap each section slightly to ensure complete coverage, and maintain a steady, even pace throughout the process.
Improper Neutralization and Rinsing
After the chemical solution has done its job, you should neutralize and rinse the floor thoroughly. Failing to do so can leave residual chemicals behind, which can discolor the wood over time and potentially damage the new finish.
To neutralize the solution, follow the manufacturer’s instructions precisely, using the recommended neutralizing agent and dilution ratios.
Once neutralized, rinse the floor multiple times with clean water, ensuring no chemical residue remains. Consider using a wet/dry vacuum or a specialized floor-drying system to expedite the drying process and prevent moisture-related issues.
Choosing the Wrong Finish or Application Method
The final step in the restoration process is applying a new finish to protect and enhance the renewed hardwood floor. However, selecting the wrong type of finish or applying it incorrectly can undo your hard work.
Before choosing a finish, consider factors like the hardwood floor’s intended use, the amount of foot traffic it will endure, and your personal preferences for sheen and durability.
Oil-based polyurethane finishes are known for their durability but can impart an amber hue, while water-based options offer a clearer finish but may be less resistant to scratches and scuffs.
Additionally, pay close attention to the application method recommended by the finish manufacturer. Some finishes are better suited for spraying, while others perform best when applied with a lambswool applicator or specialized floor-coating tools. Improper application can lead to bubbles, streaks, or an uneven finish that detracts from the restored floor’s beauty.
By being mindful of these common pitfalls and taking proactive measures, you can ensure a successful hardwood floor restoration project with a flawless, long-lasting finish.
Can You Restore All Types of Hardwood Floors Without Sanding?
The simple answer is yes, most hardwood floors can be restored without sanding. Great news, right?
However, it’s important to understand that not every hardwood floor qualifies for this method. The condition of the hardwood floor plays a key role in determining if restoration without sanding is suitable. If the damage is superficial like scratches, dullness, or mild wear, you’re in luck! This restoration method can breathe new life into those floors.
But if hardwood has deep gouges, severe stains, or extensive damage penetrating the wood surface, sanding may be unavoidable. In such cases, it’s best to have a hardwood floor refinishing professional assess the floor to ensure the best approach.
Now, let’s talk about types. Solid hardwood and engineered wood floors with a thick enough veneer can often be restored without sanding. But for thin veneers or laminate floors, this method may not work as effectively.
The key is objectively assessing the floor’s condition. With the right products and techniques, you can revive most mildly to moderately worn hardwood floors, saving time, money, and avoiding that dreaded dust storm.
How Long Do Restored Hardwood Floors Last Without Sanding?
With proper care and maintenance, hardwood floors restored without sanding can last an impressively long time – we’re talking years, folks! The lifespan primarily depends on two factors: the quality of the restoration process and the level of foot traffic the floors endure.
Let’s start with the restoration process itself. Using top-quality, professional-grade products and following the manufacturer’s instructions precisely is crucial. Skimping on quality or cutting corners will likely result in a shorter lifespan for your restored floors.
Next, foot traffic. High-traffic areas like entryways, hallways, and living rooms will undoubtedly experience more wear and tear than low-traffic spaces like formal dining rooms or guest bedrooms. So, if you have a busy household with kids, pets, or frequent entertaining, your floors might need a little TLC sooner.
On average, though, you can expect beautifully restored hardwood floors to last anywhere from 3 to 7 years without needing a full sanding job. Of course, regular cleaning, spot treatments, and reapplying finish coats as needed can extend that lifespan even further.
Is Restoring Hardwood Floors Without Sanding Cost-Effective?
Absolutely! Restoring hardwood floors without sanding is not only a time-saver but also a cost-effective alternative to the traditional sanding method.
First off, sanding hardwood floors is a laborious and messy process. It involves renting or buying specialized equipment, covering up every nook and cranny to contain the dust, and then dealing with the aftermath of cleanup. Not to mention, you’ll need to move out all your furniture and potentially seek temporary living arrangements during the process.
In contrast, restoration without sanding is a breeze. It’s a low-dust, low-mess operation that can be performed without having to vacate your home or disrupt your daily routine. And since it doesn’t require heavy-duty equipment or extensive preparation, the labor costs are significantly lower.
But that’s not all! Sanding hardwood floors also involves the added expense of refinishing products like stains and polyurethane, which can quickly add up, especially for larger areas. With restoration sans sanding, you’re often only paying for specialized cleaning and revitalizing products, making it a more budget-friendly option.
Now, let’s talk numbers. On average, sanding and refinishing hardwood floors can cost you anywhere from $4 to $15 per square foot, or even more if you factor in the cost of temporary accommodation. Restoration without sanding, on the other hand, typically ranges from $4 to $8 per square foot, depending on the products used and the size of the area.
Can You Restore Engineered Hardwood Floors Without Sanding?
Yes, engineered hardwood floors are one of the best candidates for restoration without sanding. Unlike solid hardwood, which is made from a single piece of wood, engineered hardwood is constructed with multiple layers. The top layer, known as the veneer or wear layer, is made of real hardwood, while the core is composed of plywood or high-density fiberboard.
This unique construction gives engineered hardwood floors a distinct advantage when it comes to restoration sans sanding. You see, the veneer layer is relatively thin, typically ranging from 1/12 to 1/4 inch thick. Sanding this layer too aggressively or too frequently can quickly diminish its lifespan, potentially exposing the core layers beneath.
That’s where restoration without sanding comes in handy. By using specialized cleaning solutions and revitalizing products, you can breathe new life into the veneer layer without compromising its integrity or depth. This gentle approach effectively removes surface scratches, dullness, and minor wear, leaving you with gorgeous, like-new floors without the risk of sanding through the veneer.
Of course, it’s essential to assess the condition of your engineered hardwood floors before attempting restoration. If the damage is extensive or penetrates beyond the veneer layer, sanding and refinishing might still be the better option. But for most cases of mild to moderate wear, restoration sans sanding is an efficient, cost-effective, and floor-friendly solution for engineered hardwood floors.
How to Restore Parquet Flooring Without Sanding?
Parquet floors are a classic beauty, adding warmth and character to any space. But over time, even these elegant hardwood floors can succumb to wear and tear, losing their luster and charm. Fear not, though, because restoring parquet floors without sanding is totally doable!
First things first, let’s understand what parquet flooring is all about. These intricate floors are made up of individual wood slats or tiles arranged in geometric patterns, like herringbone or basket weave designs. The combination of different wood grains and patterns creates a visually stunning and unique floor.
Now, when it comes to restoration sans sanding, the process for parquet floors is a bit more intricate than your standard hardwood. Why? Well, those nifty little seams and grout lines between the wood tiles or slats can trap dirt, grime, and wear over time, making them a bit trickier to clean and revive.
Get in Touch With Best Hardwood Floor Restoration Service Provider
When it comes to reviving the beauty and luster of your hardwood floors, our Local Philly Hardwood Experts stand out as the premier choice for several compelling reasons:
- Over 10 Years of Hardwood Flooring Experience
- Certified Professionals in All Major Refinishing Techniques
- Dust-Free, Low-VOC Sanding and Finishing Process
- Meticulous Attention to Detail and Craftsmanship
- 100% Satisfaction Guarantee on All Projects
Whether you need a full sand and refinish, repair of scratches and dents, or a fresh new stain color, you can trust the team at Philadelphia Hardwood Restoration to breathe new life into your floors. Don’t let worn, scratched, or dull hardwood detract from the elegance of your home any longer.
Over time, even the finest hardwood can lose its sheen due to wear, sun exposure, and lack of maintenance. When you start to notice your once gleaming floors looking lackluster, it’s time to call in the experts. Our skilled craftsmen will meticulously sand away any imperfections and apply a fresh, even coat of stain and polyurethane – ensuring your floors look gorgeous for years to come. Contact us today for a free consultation!